Have you wondered how you can create a knowledge base using the Web Issue Tracker in OfficeClip? Creating a knowledge base can save you valuable support time by allowing your customers to handle simpler issues themselves without repeatedly answering the same questions. Using the OfficeClip Bug and Issue Tracker you can create a new binder for the knowledge base and then make the binder available to your users at your website.
One of the advantages of creating a knowledge base using OfficeClip is that you can make both a public as well as secured knowledge base. The public knowledge base can be kept on your website for anyone to browse. The secured knowledge base can be provided to your customers and partners so that they can use it from a password protected area.
[more]
Create a New Binder
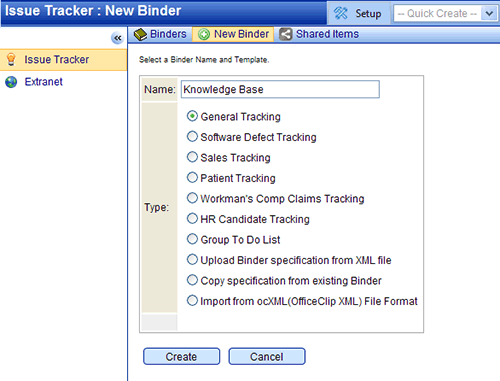
Go over to the Issue Tracker application and click on New Binder. Select a binder type that you want to create the knowledge base for:

Enter Cases
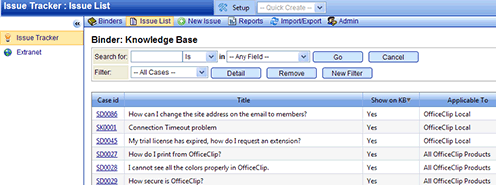
Once the binder is created, customize the fields that you want to show on your knowledge base and then start entering the knowledge base queries or titles. You can also create a custom field to determine whether a particular article should be put in the knowledge base.

Create Extranet Item
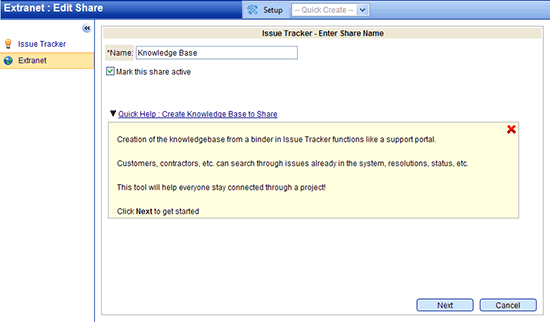
When you have filled in the titles in the knowledge base binder, start the Extranet application and create a new Extranet item of type knowledge base. You can set up through steps in the wizard what fields will be shown in the output, and whether the knowledge base will be public or secured (determining who has access to the knowledge base.)

Show Knowledge Base on your website
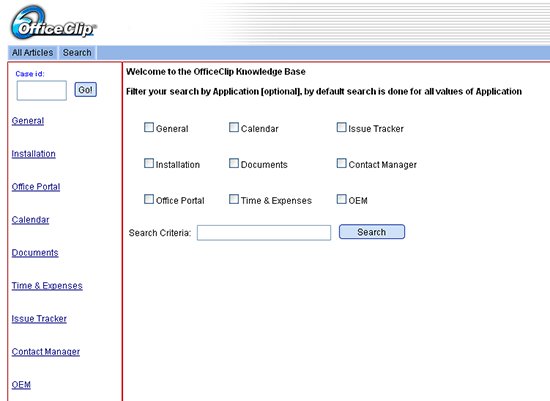
Finally, copy the url from the final step (for public knowledge base) and direct users to this page. Alternatively, you can put this in an IFRAME and show it within an existing web page.
The knowledge base will be shown on your website as shown below:

Photo courtesy Flickr Creative Commons Attribution License


